Photoshop Introduction- Self-Portrait Task
This workshop introduced us to Adobe Photoshop CC, this session was focused on basic montage principles, involving a variety of selection methods and layer properties, whilst maintaining editability, using non-destructive workflows. In this session, we were introduced to 'smart objects' commonly used in shared document contexts. Along with the program Adobe Bridge where we looked at the concept of ‘sidecar’ files as part of this workflow. We needed a new awareness of digital image files types, due to the advent of digital single-lens reflex (DSLR) cameras and RAW files.


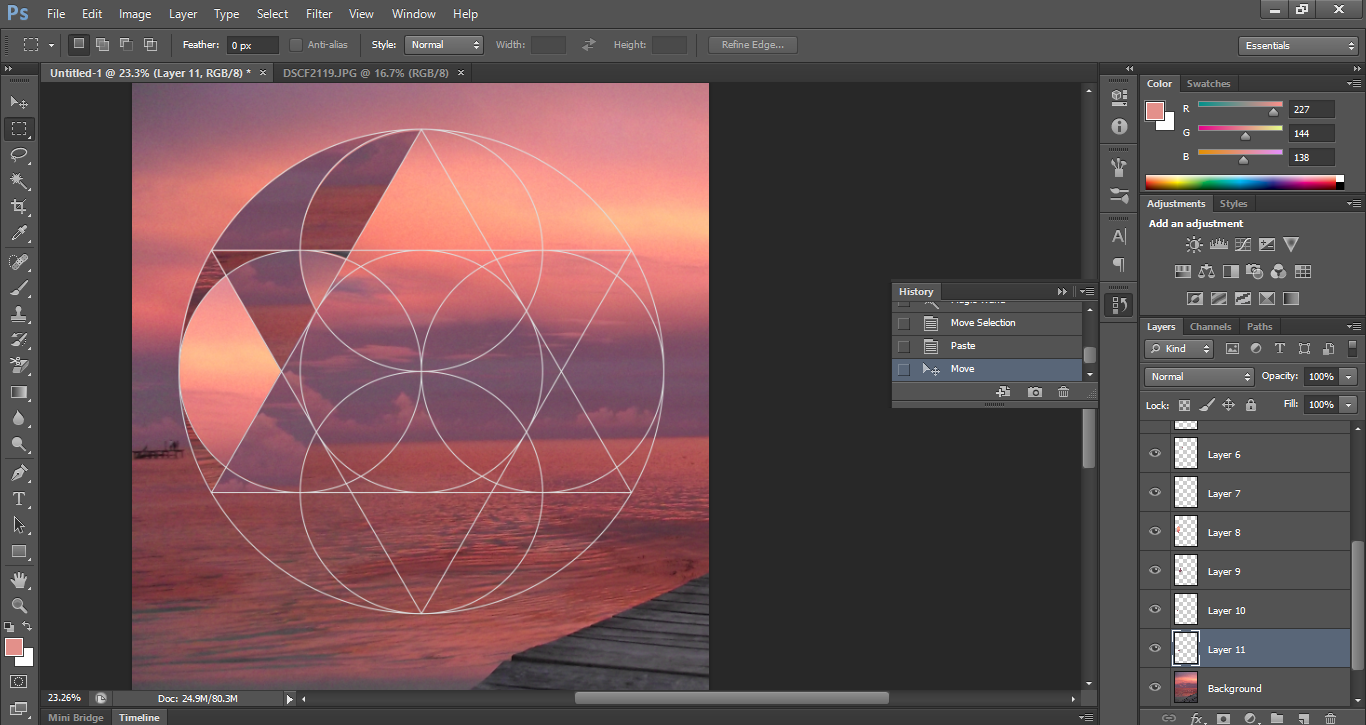
We were given this an independent learning task- To create a fully editable, photomontage which is a self portrait and a visual expression of our own self-image. Emphasising particularly in the communication of identity and personal narratives. This file needs to be A4 portrait and output to a layout-ready tiff file in 24 bit RGB. Further this tutorial, I wanted to continue experimenting a similar process using my own image and a different portrait. Below is a portrait I did which uses one of the photographs that was taken when I was out at sea, I used this as a background and experimented using geometric shapes which were created in illustrator to create a geometric collage.


Looking at Adobe Bridge, using raw image files, we edited photos in multiple ways. Firstly, I was introduced to the 'lens correction' tool, in this case, using an incorrect lens can cause the perspective of photographs to be tilted or skewed, distorting the perspective, especially in photographs that contain continuous vertical lines of geometric shapes. The two screen shots below show the effect of enabling lens correction.


After learning about Adobe Bridge, we then opened up Photoshop. From the first workshop, we used the photos of ourselves which were photographed in a green/blue screen studio in order for us to experiment with basic chroma key methods. Chroma key compositing is a special effects or post-production technique for layering two images together based on colour hues. The idea of this is to remove the background from the subject of a photo then replace it with a different image. We first experimented this with a picture of the university, then was able to apply this to out portrait photos.


After a few experiments and practising with these tools, we then began to do similar steps with our portrait photos. The first step was using the colour range to select the background I wanted to remove.


On a new photoshop file, I created a small banner which consisted of the word '#hudgda', this was then converted to a smart object, which are layers that contain image data from raster/vector images, preserving images source content with all its original characteristics, allowing you to perform nondestructive editing to the layer. This was then dragged onto my original document.


I then began to edited certain features of the image, such as adding highlights to make the sky look brighter and adding shadows to add more depth to the image.

After learning about Adobe Bridge, we then opened up Photoshop. From the first workshop, we used the photos of ourselves which were photographed in a green/blue screen studio in order for us to experiment with basic chroma key methods. Chroma key compositing is a special effects or post-production technique for layering two images together based on colour hues. The idea of this is to remove the background from the subject of a photo then replace it with a different image. We first experimented this with a picture of the university, then was able to apply this to out portrait photos.

The simple way to remove a background of an image is the 'magic wand' tool which looks for pixels which are of the same colour and tone. The tool is useful for selecting large, solid blocks of colour. I change the tolerance of the tool a few times in order to try and select as much as the background as possible without affecting the foreground. Once I was happy with it, I then just deleted the sky from the background.


Another method we looked at was through 'colour range'. This command selects a specified colour or range within an existing selection or an entire image. While the command is up, you can use the colour picker tool where you select the colour/range you want. As there was several tones in the sky, holding down the shift key while using the colour picker and moving it across the sky selected that whole range. As seen in the third screenshot, you can see what the colour range has selected.


After a few experiments and practising with these tools, we then began to do similar steps with our portrait photos. The first step was using the colour range to select the background I wanted to remove.


Using the refine edge option, I smoothed out the edges of my picture to give the image a softer edge. After this I then deleted the green background.

I scaled my image then move it around the document to find a suitable location, when placed, my image was converted to black and white, which was then duplicated and edited to solid black colour which acted as a silhouette.


I then added a background and using the properties tool of the layer, I edited a few of the features including reducing the colour hue and adding saturation, which achieved a dark, pink glow and lower brightness of the image so it contrast with the picture of me.


Another background was then added to my picture, using this layer, I created a clipping mask. A clipping mask is a group of layers to which a mask is applied, in my case, the text image that I recently added appears through only the shape of the silhouette behind me.

This is what my final piece looks like.
We were given this an independent learning task- To create a fully editable, photomontage which is a self portrait and a visual expression of our own self-image. Emphasising particularly in the communication of identity and personal narratives. This file needs to be A4 portrait and output to a layout-ready tiff file in 24 bit RGB. Further this tutorial, I wanted to continue experimenting a similar process using my own image and a different portrait. Below is a portrait I did which uses one of the photographs that was taken when I was out at sea, I used this as a background and experimented using geometric shapes which were created in illustrator to create a geometric collage.


I also tried different colours and filters to a style I feel best suits me.


